Today, almost every modern application comes with an embedded system. From the latest smartphone, smartwatches, and automobiles to sophisticated home security alarms, medical equipment, IoT products, and more, embedded systems exist within millions of simple and complex products around us, enhancing our quality of life.
Embedded systems impact our daily life activities, interactions, and tasks—the way we spend our time off, the way we travel, and the way we do business. With diverse applications in communications, transportation, manufacturing, retail, consumer electronics, healthcare, and energy, embedded systems have transformed how we interact with technology in our everyday lives.
So, what is an embedded system? An embedded system/solution is a computer system—a combination of hardware and software—designed to perform a specific function within a larger mechanical or electrical system. Most embedded systems are based on programmable microcontrollers or processors. Typically, embedded systems have three main components: the hardware, the software, and the real-time operating system.
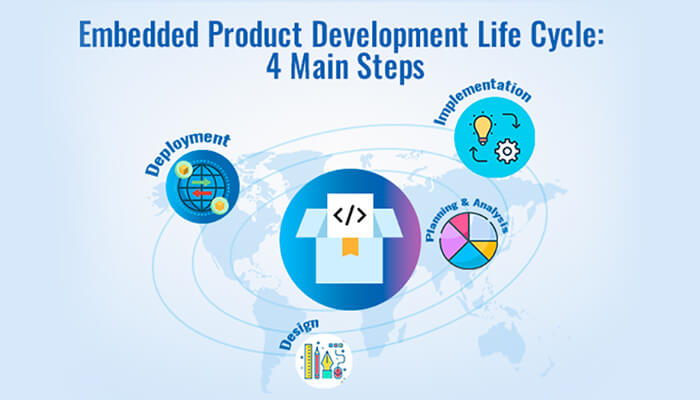
Launching a new embedded product can be exciting and challenging at the same time. In this article, we’ll explain the general outline of the four different development life cycle phases of an embedded system.
What is Embedded Development Life Cycle (or EDLC)?
An embedded (or IoT) product development life cycle is similar to the typical product development life cycle for all software.
For building and developing a successful embedded product, following a well-defined embedded system design and development life cycle is critical. It ensures high-quality products for end-users, defects prevention within the product development phase, and maximized productivity for a better ROI.
Here are the four stages of the development process of embedded systems:
- Planning and Analysis
- Design
- Implementation
- Deployment
Other than the fact that IoT solutions need network connectivity, the development life cycle phases for embedded and IoT products are almost similar.
Please note that this is an optimal approach. Each of these 4 steps comprises sub-steps that may vary or require some adjustments as per the project.
4 Different Steps of Embedded Development Life Cycle
Step #1 – Planning & Analysis
Define your business idea and demonstrate the concept feasibility
The first step in the product development life cycle is to clearly define your product idea that will fulfill a market niche and address a problem. You must then perform the analysis to see if the idea can transform into a viable concept before development is started.
Identify ‘the need’
The development life cycle of an embedded product should initiate as a response to a need. The need may come from an individual, public, or company. Based on the need, a statement or “concept proposal” is prepared, which should get approval from the senior management as well as the funding agency.
The need can be visualized in any one of three types:
- New/custom product development: the need for a product that does not exist in the market or will act as a competitor to an existing product.
- Product re-engineering: the need to reengineer a product already available by adding new features or functionality.
- Product maintenance: the need to launch a new version of a product followed by a failure due to non-functioning or to provide technical support for an existing product.
Define your target audience
A crucial yet often overlooked component of the embedded product development process is to identify and define the target market of the product. When analyzing the potential target audience, ask some of the following questions to yourself:
- Who will be the end-user of this product?
- What are the end user’s demographics such as gender, age, profession, etc.?
- When is the product used by the end-user? And how often?
- Why will the end-user need the product?
Only after carefully answering these questions, you can determine your target audience and identify your market.
Work out the requirements
Before moving onto the development stage, you should use the data collected during the research of the target audience to define the product purpose, its functional model, and the required hardware & software.
Discover competitors or collaborators
Once you carefully define your market, start identifying who your potential competitors may be. Acquaint yourself with their experience going through the development life cycle to learn and choose a better approach for your project. Analyze your competitors’ products to anticipate end users’ reactions to your final product.
Take time to carry out further market research to connect with potential collaborators and realize how well your business idea will be received in the market.
Step #2 – Design
Choose a development approach for implementation of your idea
Before designing the prototype, you need to decide on the development approach so that your idea can turn into a reality within budget.
Create product’s architecture
The designing process starts with developing the architecture of the product based on the specific requirements gathered in the planning & analysis phase. The architecture should reflect software and hardware components that will ensure the performance of target functions.
Identify the right tools & technologies
Carefully identify the technical resources needed to build a proof-of-concept that can be used for market research, concept refinement, and investment pitches before moving to the implementation stage.
A proof-of-concept is a small model that has the MVP (minimum viable product) features based on development kits.
Types of Development Kits (for developing a proof-of-concept):
- Microcontroller kits
- Application processor kits
- Processor modules
- Breakout boards
These out-of-the-box, pre-built hardware platforms usually come with integrated software to kick start a project.
It is important to pay attention to several features when deciding on a development board for embedded processor, including the available peripherals, connectors, other communication peripherals, and onboard sensors, as well as the mechanical form factor and mounting style in a prototype enclosure.
Choose Embedded Software Development Tools
- coding languages (C, C++, JavaScript, Python, etc.)
- operating systems (Linux based or RTOS based)
- SDKs (PyCharm, WebStorm, Qt Creator), IDEs, compilers, debuggers, and more.
Pick a development team
At a minimum, an embedded product development team will need one each of the following:
- Embedded software engineer
- Hardware engineer
- Mechanical engineer
- PCB layout engineer
Depending on the project complexity and budget, you can decide if you need more than one of each of these engineers. Additionally, you may also need experts with knowledge about security management, cloud-based software development, and team management for embedded or IoT product development.
Getting these technical resources to work under one roof for your project can be costly. However, you can also hire embedded design & development engineers and outsource it to a reliable service provider that specializes in embedded product development.
Step #3 – Implementation
Create a prototype realizing the design; test and improve quality of embedded solution
In the implementation stage, a prototype of the embedded product is created. It also includes adding new features and improving the quality of product by embedded software engineers.
When your product’s hardware components like sensors and processors are integrated on a PCB for the first time, we call those PCBs alpha prototypes. Generally, small functional issues may occur which can be fixed with some tuning and adjustments.
As new features are added to the product, you finally get a production-intent design, which we refer to as a beta prototype.
The product is then tested in the field to check if your solution is working as expected and enhanced for quality based on end-user feedback.
Software developers will also consider the marketing feedback and further check if the solution meets regulatory requirements, and ensure the embedded solution is secure, scalable, and maintainable.
Step #4 – Deployment (Product Launch)
Launch a real-life product ready for mass production
Launching a new, fully functional model of the embedded product can be an exciting and challenging time. In this stage of the product development life cycle, you need to procure the hardware components and set up a manufacturing line where they will be placed on the PCB. Procuring the spare parts and setting up the manufacturing facility require a 90-day notice. So, you should start communicating with your manufacturer and order components up to three months in advance.
Make sure the first batch of boards is tested post-manufacturing to figure out any defects or faults in the production process. Once tested, assemble them into their enclosure, do final testing before boxing and then send them to the end-users. Don’t forget about post-production support and maintenance as this is an important aspect of the embedded product development life cycle.
The above-discussed four-step process can help you successfully launch your own new embedded product.
As technological advancements and movements like the IoT, Industry 4.0, and “smart” cities continue to gain ground, embedded system development will become a major spot of innovation, which is expected to grow exponentially on a per-year basis. However, with increased adoption of embedded systems, the complexity in embedded software has also increased, which is increasing the overall cost of embedded software development.
Outsourcing embedded software projects can be a great idea for SMEs to build their product comprehensively while cutting costs and improving time to market. If you are looking to take the embedded development off your plate, what you need is a reputed offshore embedded development company that understands the challenges of embedded product development. When you hire embedded design & development engineers with knowledge and expertise in all aspects of embedded system design and development life cycle from such an offshore company, you take your business to the next level.


